Tim Saunders
Author battlefield guide and full time military historian, Tim Saunders was Educated at Clayesmore School and at the Royal Military Academy Sandhurst. He served as an officer in the Devonshire and Dorset Regiment for thirty years and has a life long interest in military history. As an officer cadet, he undertook his first battlefield tour of Normandy on a bicycle at the age of eighteen, during leave from Sandhurst, where he was one of a generation of officers who studied under Professor Richard Holmes. Since then his service, including the Falklands, Northern Ireland, the Gulf and the Balkans, has provided him with the opportunity to visit many less well known battlefields around the world. Since leaving the Army Tim has appeared on TV in programmes as diverse as Channel 4's Time Team, Battlefield Detectives, the word programme Balderdash and Piffle' and most recently the Lost Evidence series for the History Channel. Tim is also an author with over 10 military history titles to his name. As a battlefield guide Tim is an expert on World Wars 1 and 2 and has conducted tours at all levels from private, through schools to Amilitary units and Headquarters. Tim is a badged member of the Guild of Battlefield Guides. Tim is a director of Battlefield History TV and is it's Creative Director responible for all direction and editing.
 2012
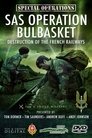
2012SAS Operation Bulbasket: Part 2 - Destruction of the French railways
 2013
2013Assault on Normandy: Gold Beach - Battle for the Beaches
2015The 95th Rifles 1809 - 1812
2012Assault on Normandy: Sword Beach
2011The Waterloo Collection: Ligny and Quatre Bras - Part 1
2014Mons 1914
2013Battle of the Bulge: Panzer Marche - The Dash for Bastogne
2014Le Cateau
2013100 Years War: Agincourt 1415
 2014
2014Bletchley Park and the Ultra Secret
201595th Rifles 1800 to Corunna
2009The Viking Invasion of Wessex 878 AD
2015First Ypres 1914 and the Race to the Sea
2014Assault on Normandy: Pointe du Hoc
2015The Germans in Normandy: 6th Fallschirmjaeger
2010Assault on Normandy: Pegasus Bridge
2013100 Years War: Crecy 1346
2015100 Years War: Poitiers 1356
2013Assault on Normandy: 6th Airborne
2011Cavalry Charge: La Haie Sainte & Plancenoit - The French and Prussian Attacks
NaNThe Waterloo Collection: Hougoumont and D'Erlon's Attack
 2015
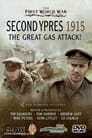
2015Second Ypres 1915: The Great Gas Attack
 2012
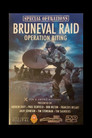
2012Bruneval Raid: Operation Biting
2010Wittmann v Ekins: The Death of a Panzer Ace
2012Operation Market Garden: Arnhem - Battle of the Woods
2015Battle of the Bulge: Siege of Bastogne
NaNArnhem: The Battle for the Bridges - Part 1
NaNVictory and Pursuit: The Waterloo Collection - Part 4
NaNThe 42nd of Foot - Black Watch - Dress and Equipment at Waterloo
2014Néry and the Retreat from Mons
2015Battles of the Marne & the Aisne
2015The Schlieffen Plan
NaNSiege Warfare 1812: Ciudad Rodrigo & Badajoz - The Keys to Spain
2013Assault on Normandy: Gold Beach - Battle for the Beachhead
1914The Race to the Sea - 1914
2015Battle of the Bulge: Saint Vith
2016Battle of the Bulge: Kampfgruppe Peiper
NaNBattle of the Bulge: An Intelligence Failure?
NaNBattle of the Bulge: Hitler's Last Gamble
NaNBattle of the Bulge: German Field Artillery
 2012
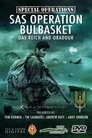
2012SAS Operation Bulbasket: Part 1 - Das Reich and Oradour
2009The 1066 Hastings Campaign
NaNSAS and the Normandy Campaign: Operation Bulbasket
201212th Hitlerjugend Panzer Division
2012Salamanca
NaNThe Somme 1916: Mansel Copse
NaNThe Background and Outbreak of the English Civil War
NaNThe Battle of Naseby 1645
2012Operation Market Garden: Arnhem - Battle for the Oosterbeek Perimeter
 2015
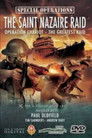
2015The Saint Nazaire Raid: Operation Chariot - The Greatest Raid
2012Operation Market Garden: Nijmegen
201495th Rifles: 1812 to the Pyrenees
NaNThe Charge That Saved the Empire: Geluveldt 1914
2013Assault on Normandy: Gold Beach - Battle for the Beaches
2012Assault on Normandy: Sword Beach
2015The 95th Rifles 1809 - 1812
2009The Viking Invasion of Wessex 878 AD
2009The Viking Invasion of Wessex 878 AD
NaN95th Rifles - Dress and Equipment
2012SAS Operation Bulbasket: Part 2 - Destruction of the French railways
2012Operation Market Garden: Arnhem - Battle for the Oosterbeek Perimeter
2015